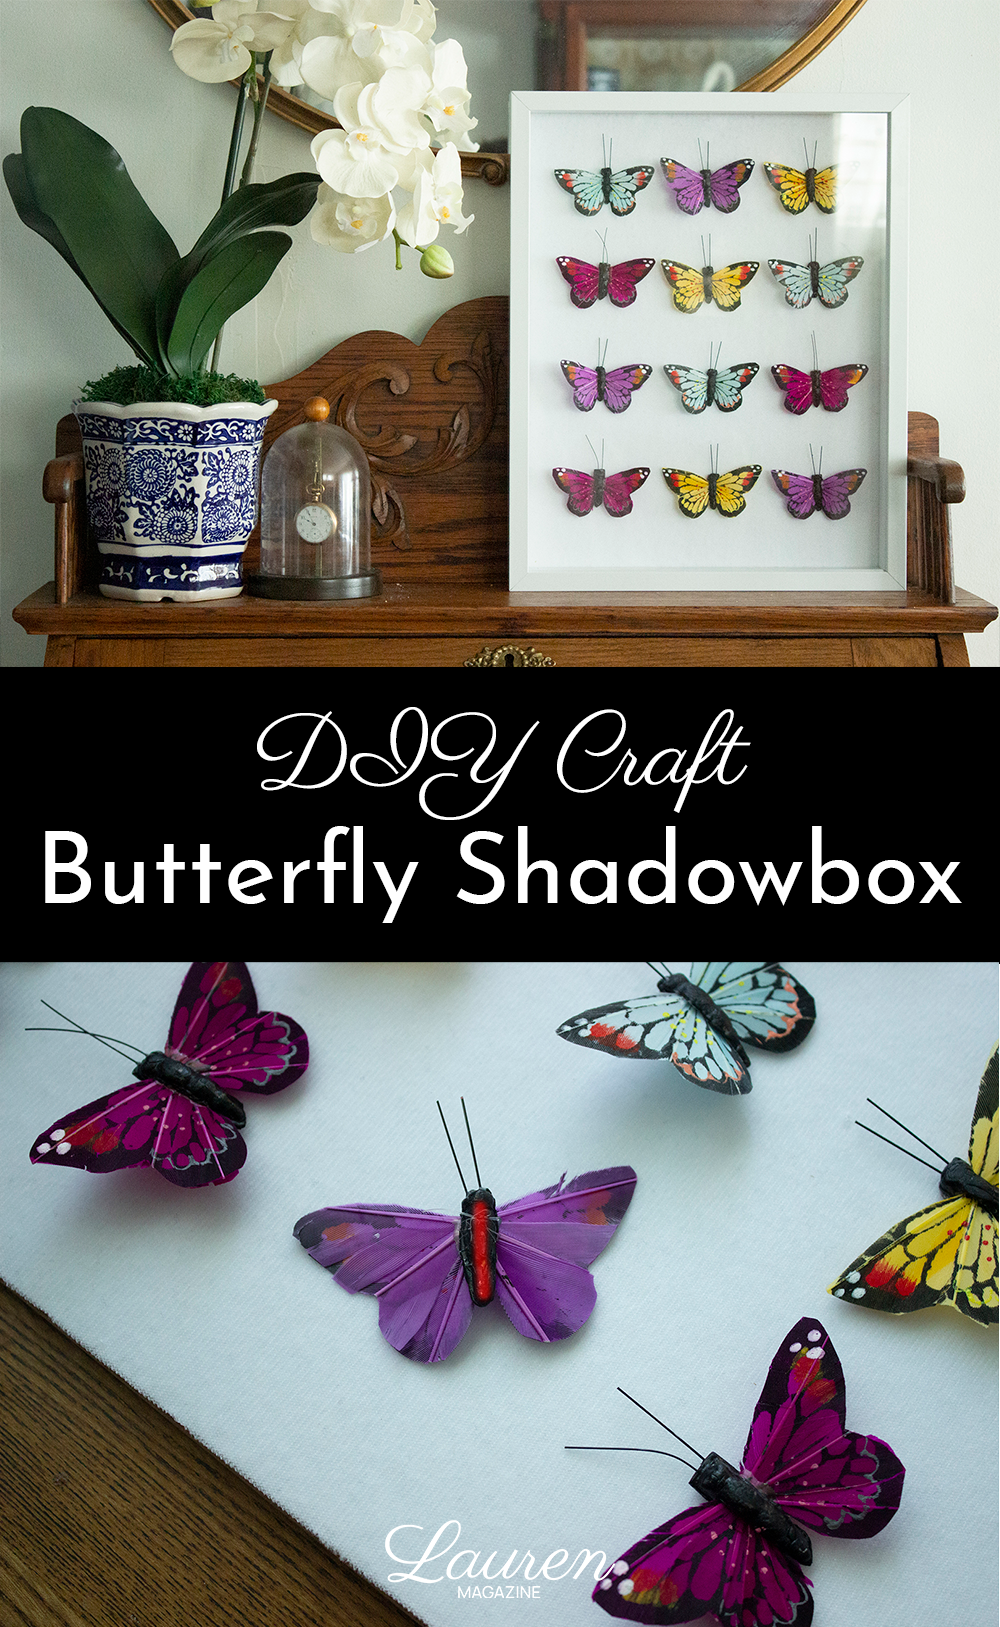
I’ve had this DIY butterfly shadowbox in my head for a long time. I was just waiting for a reason to make one, and I was so happy when I finally got an excuse! This cute and colorful butterfly craft is easy to customize to match your style. It’s perfect for a kids room, but it’s pretty enough to be a welcome addition to a more adult room as well.
My sister is making a butterfly quilt for my two year old, who loves butterflies. The quilt gave me some inspiration! I thought a butterfly theme would make the perfect bedroom to carry her through toddlerhood. It’s cute, girly, and it’s not very babyish so she won’t grow out of it too fast.

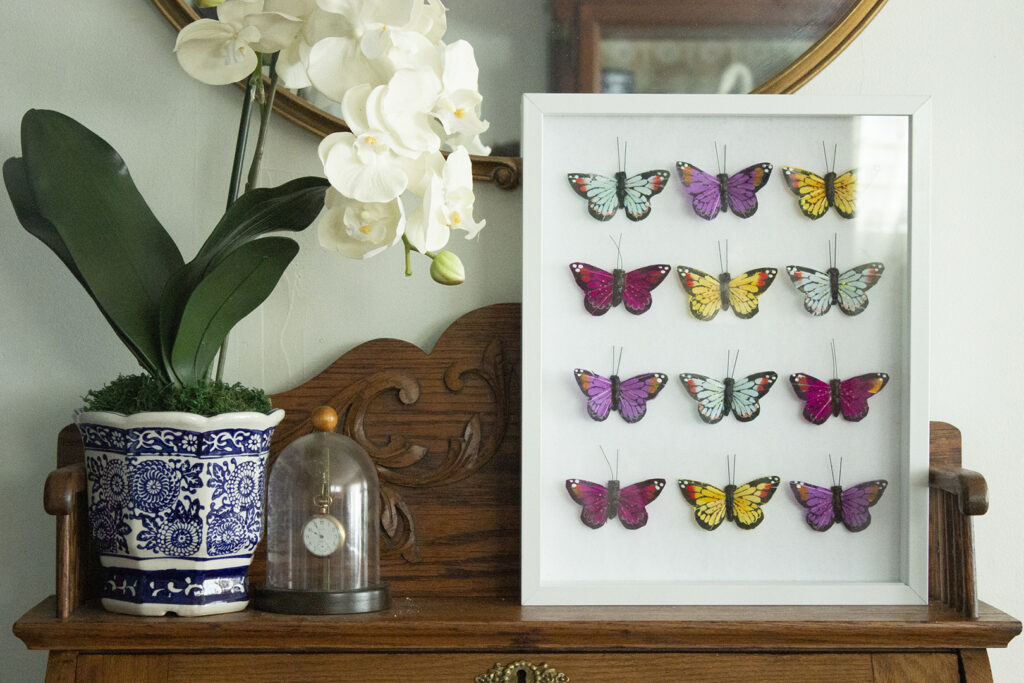
The first thing I knew I wanted to make for her new room is this butterfly shadowbox. I found a simple white shadowbox at Hobby Lobby for just $11 (mine was on clearance, but you can search their website for other options). I then purchased a few packs of colorful butterflies from the florals section.
This is a truly easy project. It came together in my kitchen in under thirty minutes – with a little toddler vying for my attention the whole time.
Take apart your shadowbox and remove the backing.
If you don’t like the background color, you can cut some pretty fabric to the size of the insert and hot glue the edges down. I skipped this step because I liked my white backdrop.
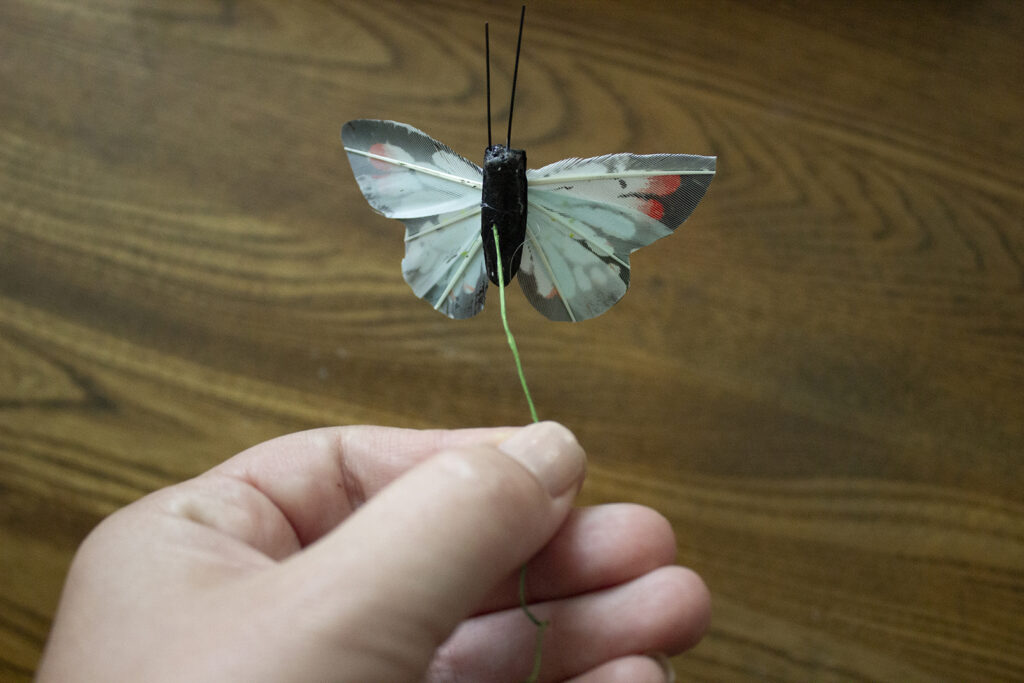
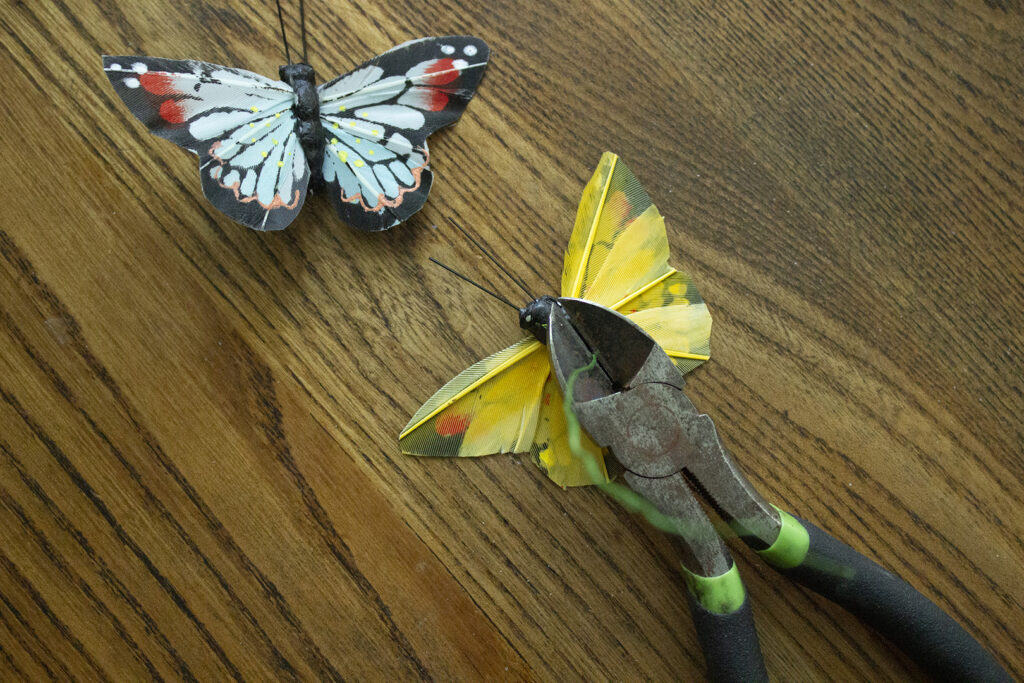
Remove butterflies from packaging. Cut the wire off of the butterflies with wire cutters.
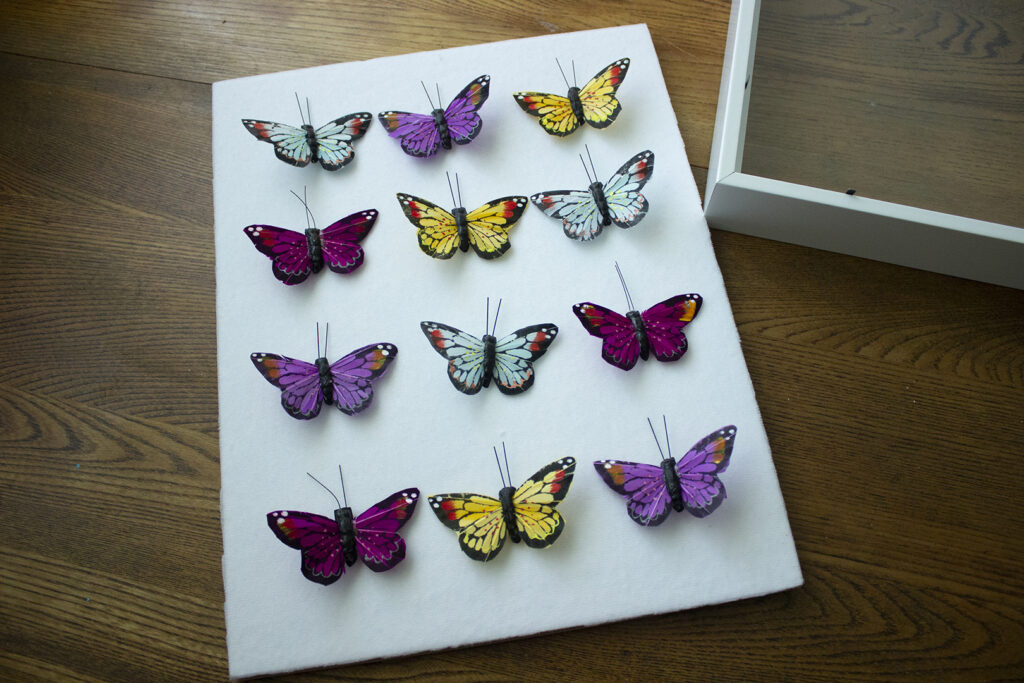
Lay out butterflies in desired pattern on the backdrop.
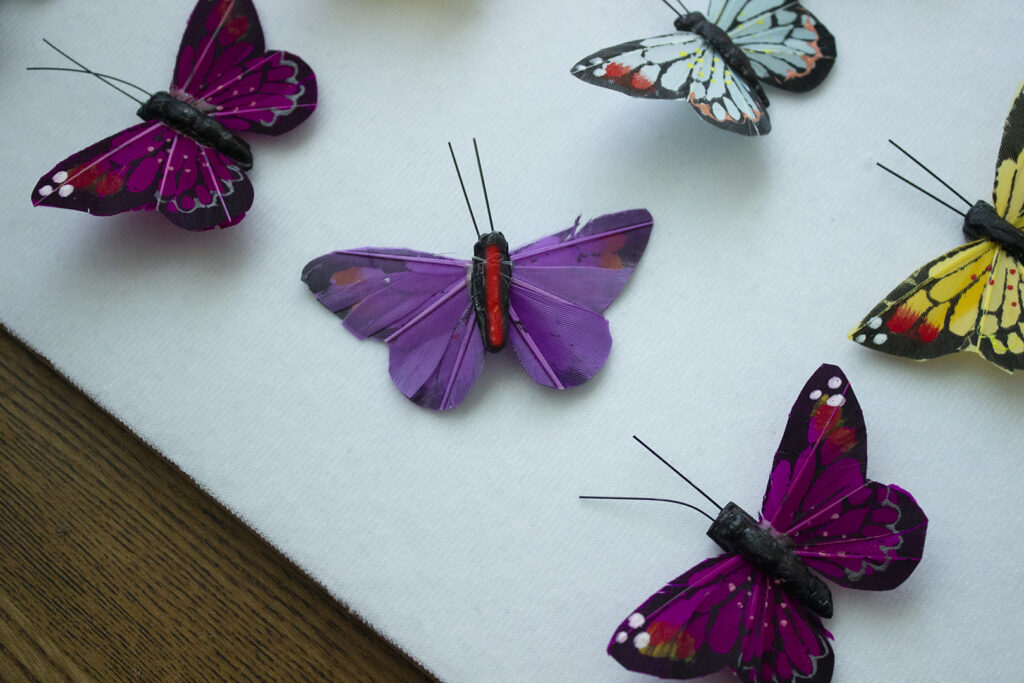
Heat up your hot glue gun. Draw a small line of hot glue on the inside of the butterflies body (as shown in red line on diagram above) and press butterfly firmly into place.
Reassemble your frame. It is ready to hang!
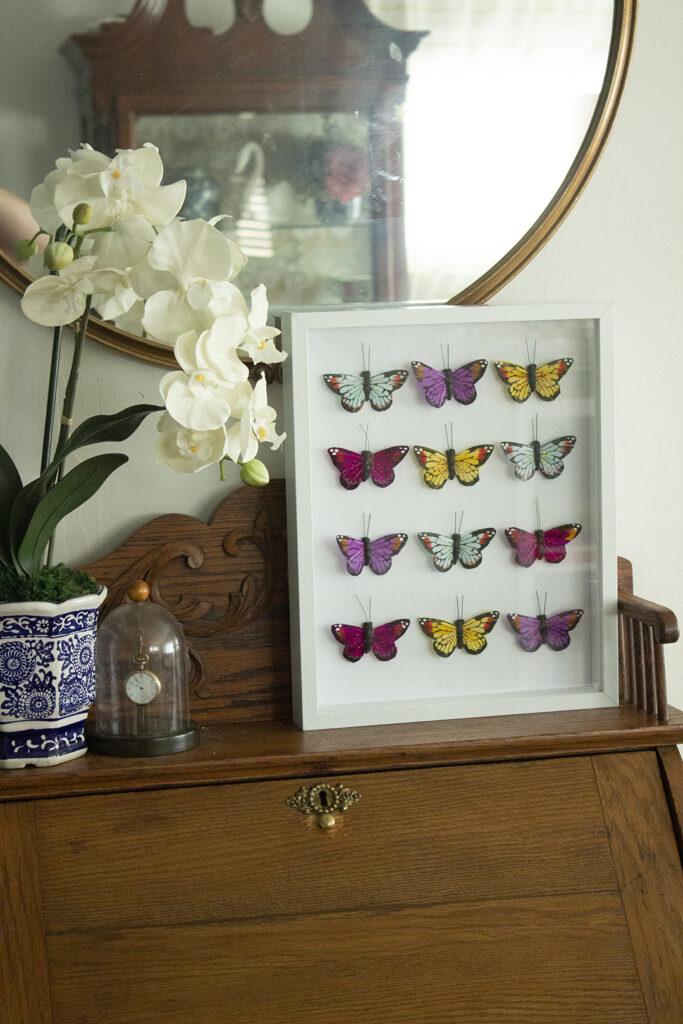
This project cost me under $20 and turned out so cute! I love the bright colors of the butterflies that I used. If you recreate this easy butterfly craft, you could try different variations. You could pick different colors, or you could frame one large butterfly in a square shadowbox. Be sure to tag Lauren Magazine on Instagram when you post your creations!

Lauren Magazine is an online lifestyle magazine for Christian women.

©2025 Lauren Correa. All rights reserved. Design by Lauren Correa.