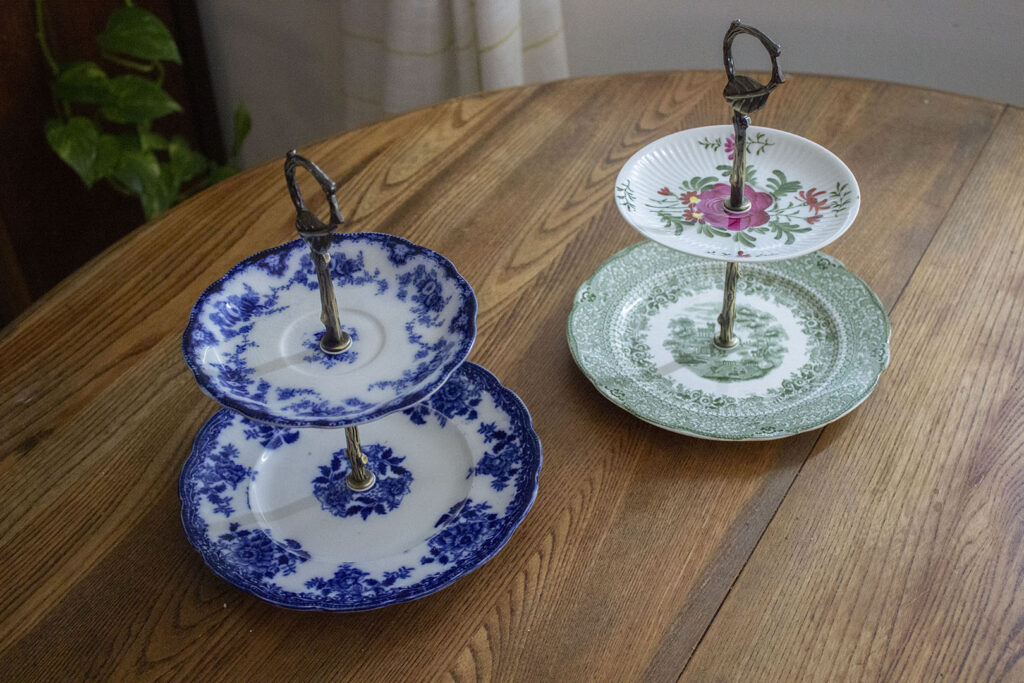
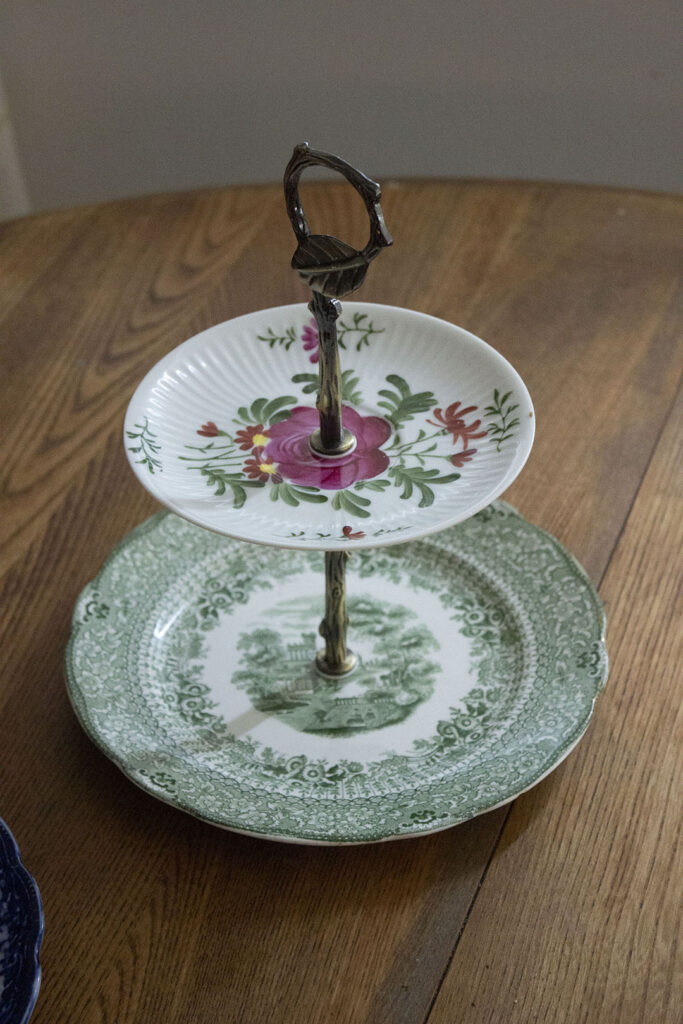
This DIY tiered tray is a beautiful way to use thrifted or mismatched plates. The next time you come across a beautiful single plate in the thrift store, or your grandma passes down a partial set of plates, you’ll know exactly what to do with them! You can use this tiered tray to serve tasty treats at a party, but it’s also great to hold jewelry or knick knacks on your dresser or vanity.
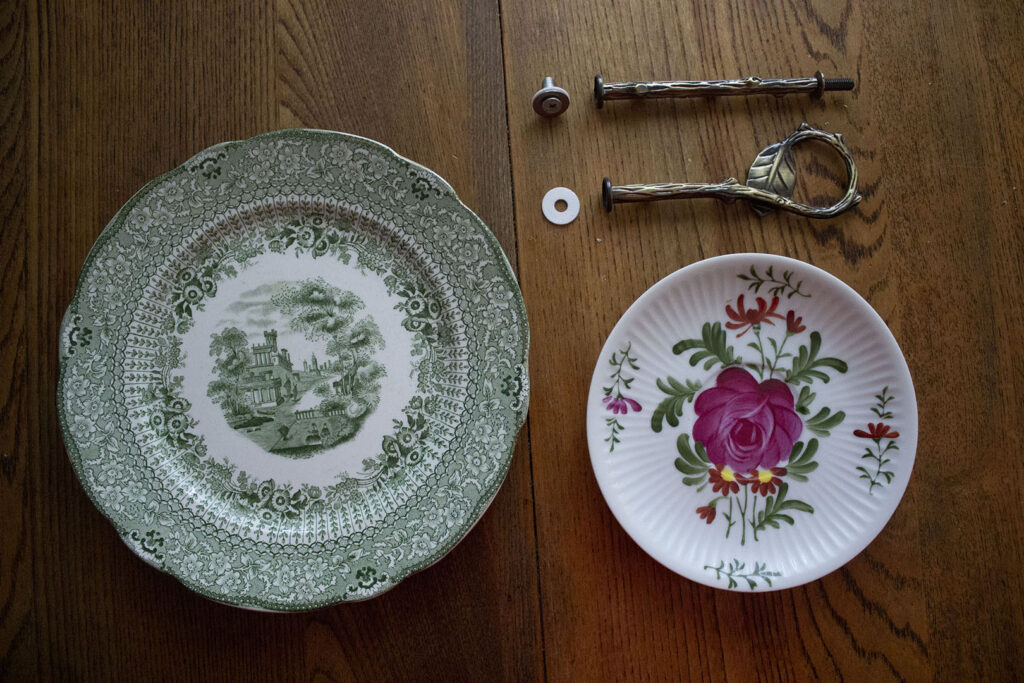
I opted to create two small trays with just two plates apiece, but you can actually go up to three tiers. You’ll want to pick up a pretty hardware kit. There are plenty available on Amazon, but this is the tiered tray hardware kit I chose to use. You may need different sized drill bits if you choose a different hardware kit.

I actually had my husband do the drilling for me because he’s more accustomed to using the drill than I am. To write the instructions, I simply watched and observed what he did. I hope this tutorial helps you to create something beautiful and save some plates from the landfill! If you need another alternative for using single plates, a plate wall is an awesome option.
*If you use the tiered tray hardware that I recommend, these are the drill bit sizes to use. It may vary if you opt for a different hardware kit. Click here for the exact drill bits that we used.
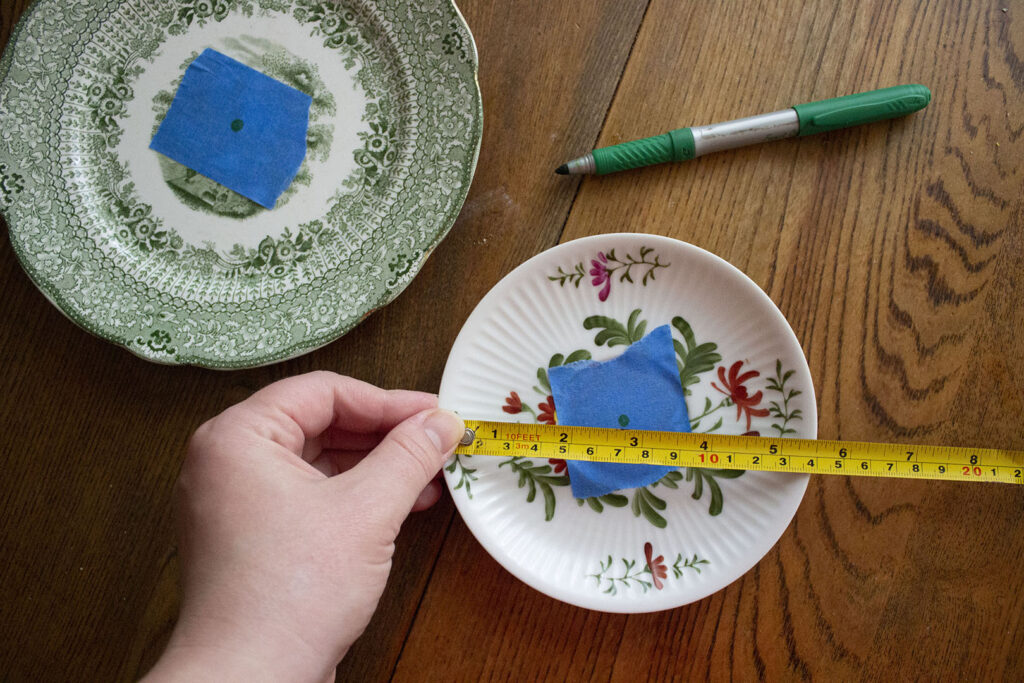
1. Place a piece of masking or painters’ tape in the center of the dishes. Mark the exact center using a marker or pencil, checking from multiple angles with a measuring tape.
2. Place each plate on your block of wood. Pour a small amount of water onto the center of the plate. This will keep your drill from overheating.
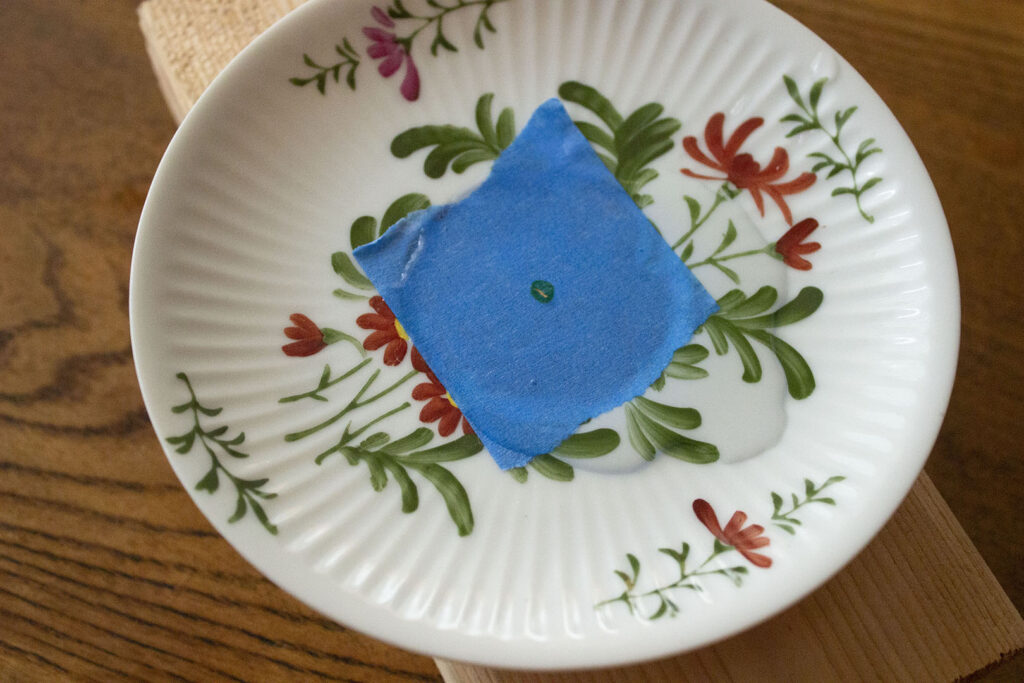
3. Using your 1/8 inch drill bit, slowly and carefully drill a hole into the center of the plate. Apply steady pressure, but don’t press too hard or work too quickly.

4. Once you’ve drilled through the plate, remove your tape. Now, replace your drill bit with the 1/4 inch bit. Place the plate back on the block of wood. Dip your drill bit into the cup of water and then carefully drill into the small hole to create a bigger one.

5. Repeat this process on the rest of your plates. Clean off your plates with a dry towel and be sure to clean up any porcelain shavings on your work surface.
6. Screw the hardware into your plates, putting the larger plates on the bottom and smaller on top. If your tiered tray is wobbly, you can add some felt pads (for chair legs) to the bottom plate to stabilize it.
If you recreate this DIY project, I want to see your photos! Tag @laurenmagazine on Instagram when you post your pics!


Lauren Magazine is an online lifestyle magazine for Christian women.

©2025 Lauren Correa. All rights reserved. Design by Lauren Correa.